Easy Holiday Petits Fours (mini cakes)
This post has been sponsored by MARS, Pillsbury, and Ziploc. All thoughts and opinions are my own.
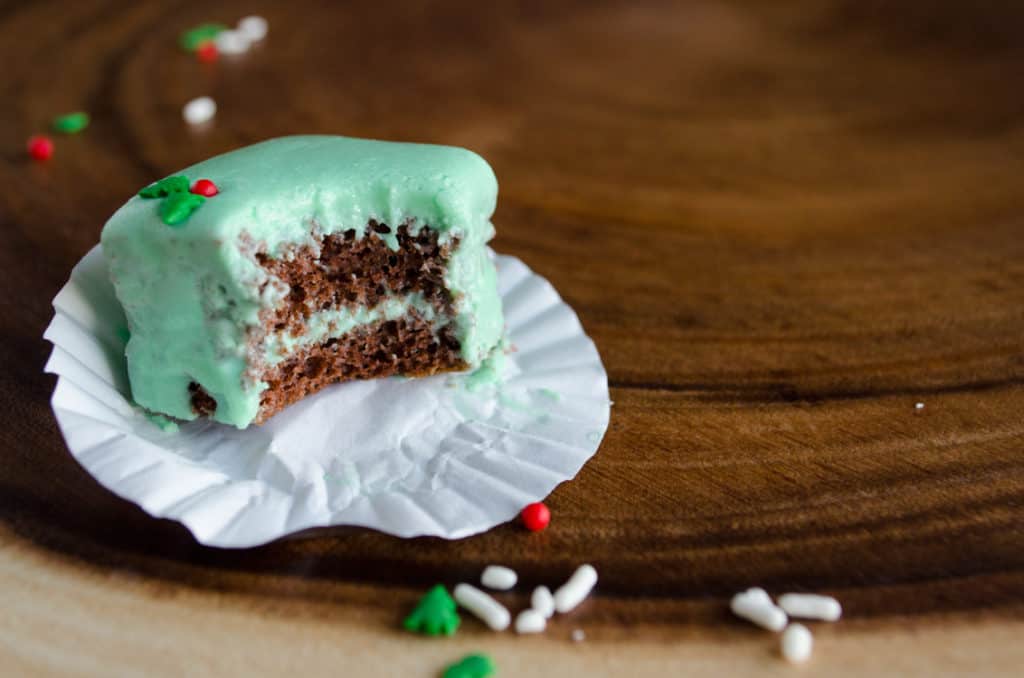
Have you ever eaten a Petit Four? You probably have, but didn’t know it had such a fancy name. Petit Four is french for “small oven” and pronounced ‘peh-ti-fur’. They can be created with just about any baked treat, but in the U.S.A they are most commonly found as little cakes with filling and a glaze frosting. I like to think of them as adorable little masterpieces :0)
Bake to impress!
These Easy Holiday Petits Fours make the most impressive little holiday treats for cookie exchanges! Or really wow your friends, family and neighbors when you spread some holiday cheer and present them with a Ziploc gift container filled with Easy Holiday Petits Fours and Dove Gifts Chocolates!
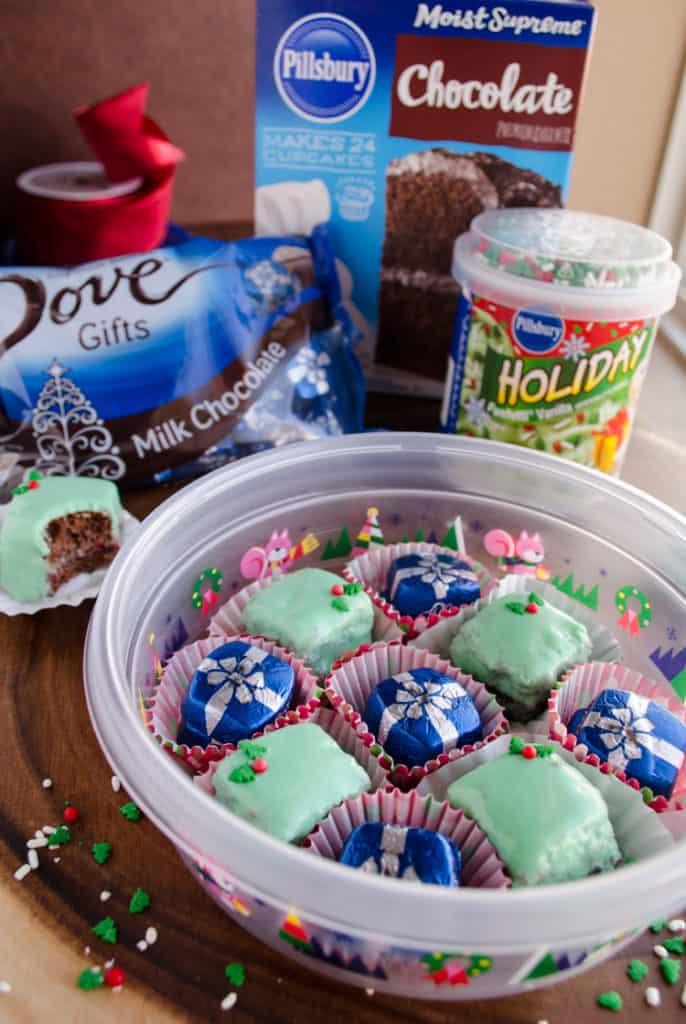
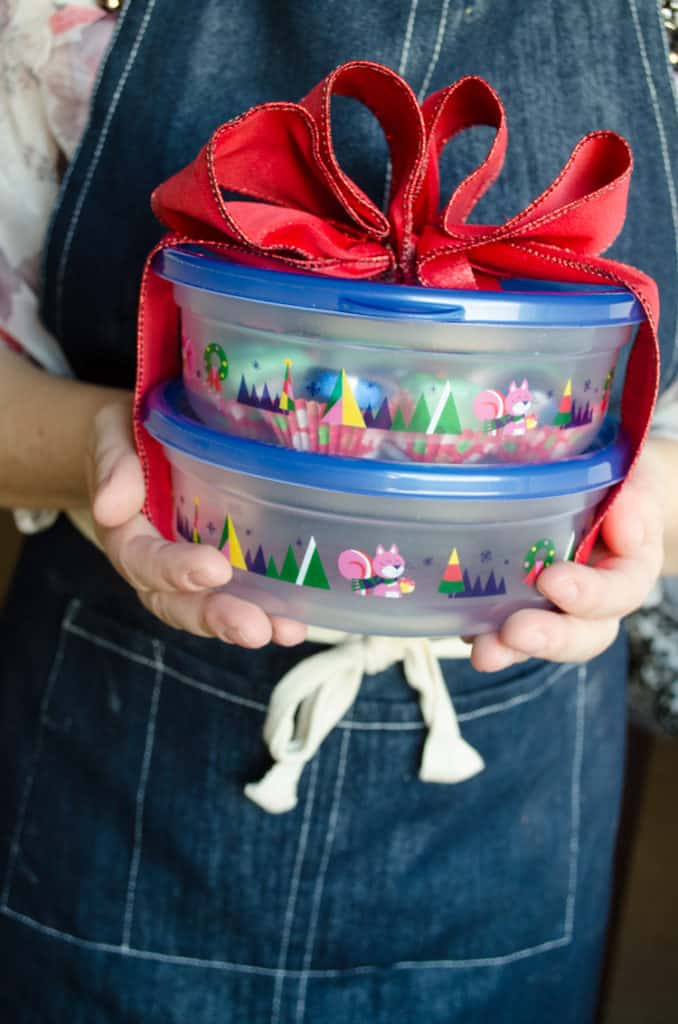
I picked up these cute Ziploc Holiday Containers shown throughout this post at Target for my holiday baking giftaways. Plus they stack so I can store a bunch of them in my fridge/freezer all filled up with goodies and ready to go. Adding in Dove Chocolate Gifts from Target (they have some amazing Cartwheel deals going on for the season) along with homemade goodies is a great way to simplify holiday gift giving, and add variety to your goodie box/container. I know I’d feel all warm and fuzzy inside if this adorable gift was for me! :0) Ziplock also has printed Holiday Bags that would be great for cookies and other treats.

No time to make from scratch? No problem.
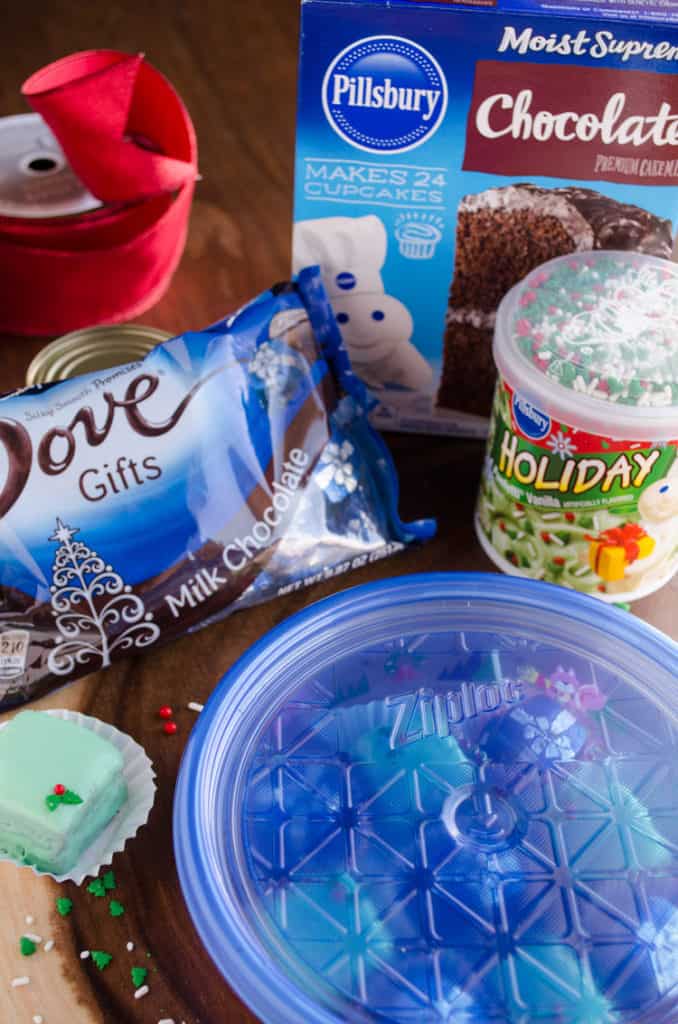
I love ‘from scratch’ baking, but sometimes I just don’t have the time. This recipe was so fun to create because I learned a couple fabulous tricks that make this recipe by far the easiest out there for petits fours. You’ll only need six ingredients. Yep. Fo’ reals, no joking around here. Six ingredients for the entire recipe! Make sure you also have these essential items: a 9 X 13 inch rimmed baking sheet, flat baking sheet, large cutting board, floss, parchment paper, serrated knife, mini cupcake liners and tweezers.* (Yes, I did say tweezers.)
I chose Pillsbury’s Moist Supreme cake mix and Funfetti Holiday Frosting for my petits fours. I like to substitute milk for the water and melted and cooled butter instead of oil in the cake mix for a richer cake. Line your baking sheet with parchment paper and spray the edges with non-stick spray. Pour in the cake batter and ‘pound’ the pan on the counter several times to get all the air bubbles out. Bake at 350 for about 35 mins. (Mine baked in about 30 mins.)
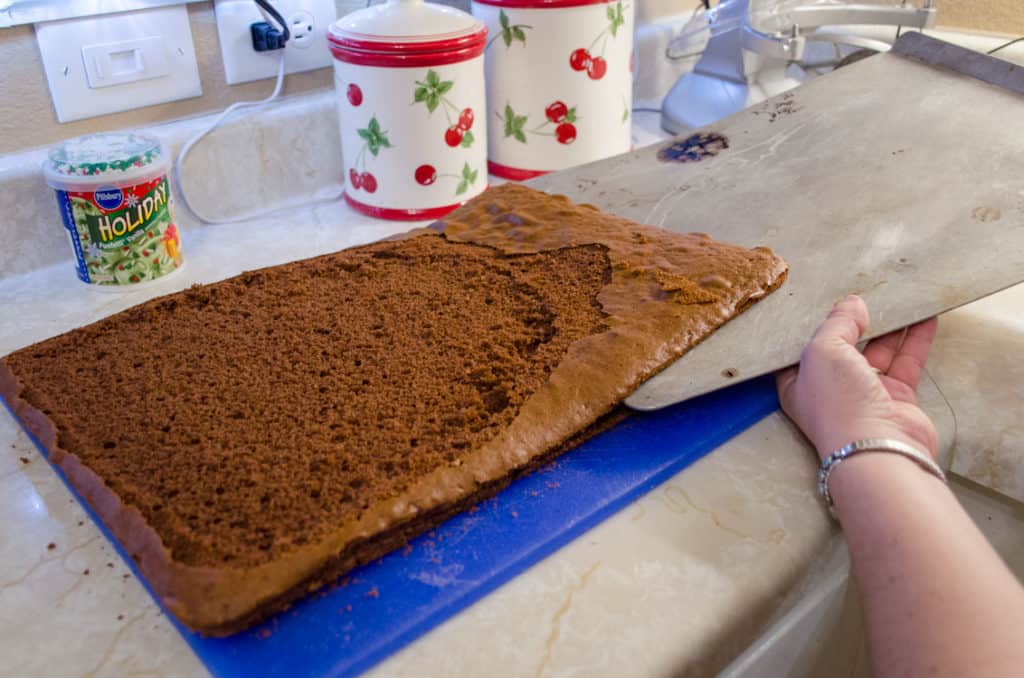
Once baked, let it cool for at least 30 mins. before moving on to the next step. When cooled, place another sheet of parchment paper over the top of the cake. Place a large flat baking sheet on top of the parchment paper. Grab the cake pan and baking sheet with both hands and flip them over together. The cake should come out super easy onto the baking sheet. Then remove the parchment paper from the ‘top’, place a cutting board on top of the cake and flip everything again so the cake bottom is now on the cutting board.
Kitchen hacks make this recipe so easy.
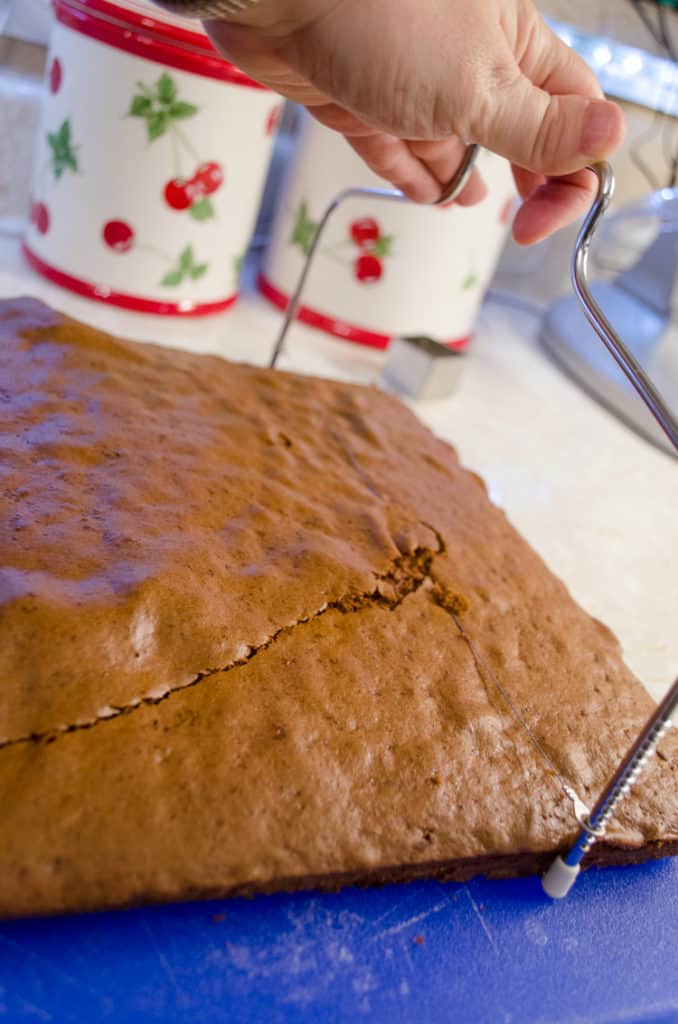
Now it’s time to slice the cake in half horizontally. I have a handy dandy tool (shown above) that allows me to slice through cakes nice and even with a little wire. ( I also sliced off a bit of the top to make the layers more even but this is not necessary.) If you don’t have one of those tools, no worries! Grab your floss and use a slow back and forth motion to carefully cut the cake into two even horizontal layers. If this gets hard, take a serrated knife and cut the cake into two halves (the normal vertical way you usually cut into cakes) so the cake(s) is a little easier to handle.
This doesn’t have to be super perfect; remember you’ll be cutting this cake into little 1″ squares, so a few mistakes is no big deal. Once you have sliced through the center, carefully slip the baking sheet under the top half and remove it. Now you can add your filling layer!
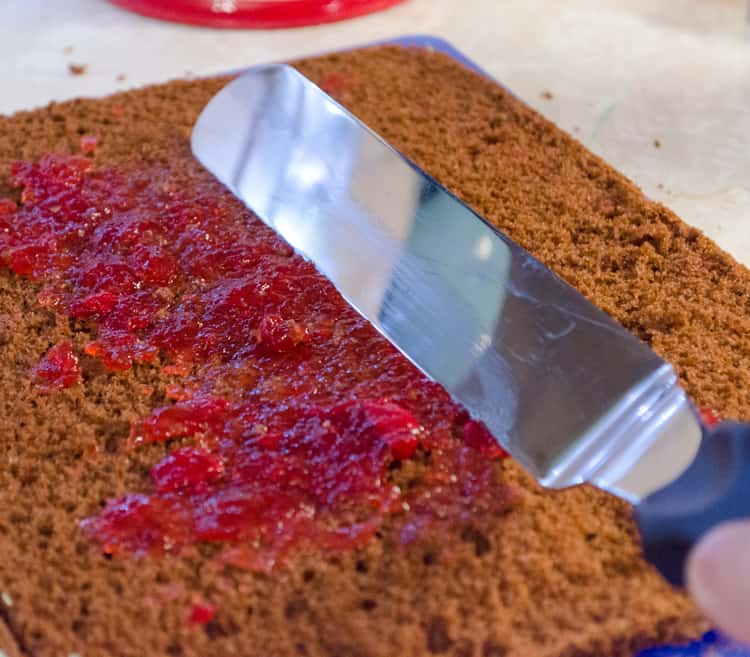
Spread a layer of strawberry or raspberry preserves over the cake. I really like fruit filling in these little treats, but you can also add a layer of frosting on top of them if you want. If you do, you’ll need to alter the recipe to three containers of Pillsbury Holiday Funfetti Frosting instead of two. Notice that I’m pouring the frosting out? Best frosting hack I’ve ever learned. Just microwaving a container of store bought frosting (lid off and foil seal removed) will give you instant frosting glaze, which really comes in handy later on!
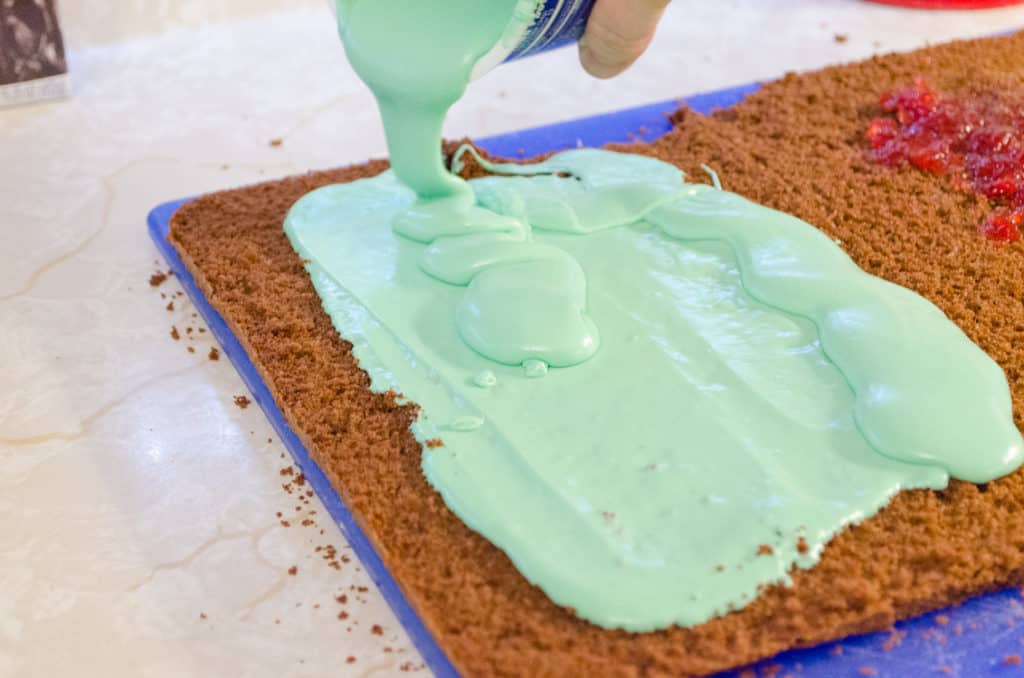
Next, replace the top layer of cake by sliding it to the edge of the baking sheet and lining up the cake corners. Gently slide the top layer off as you pull the baking sheet out.
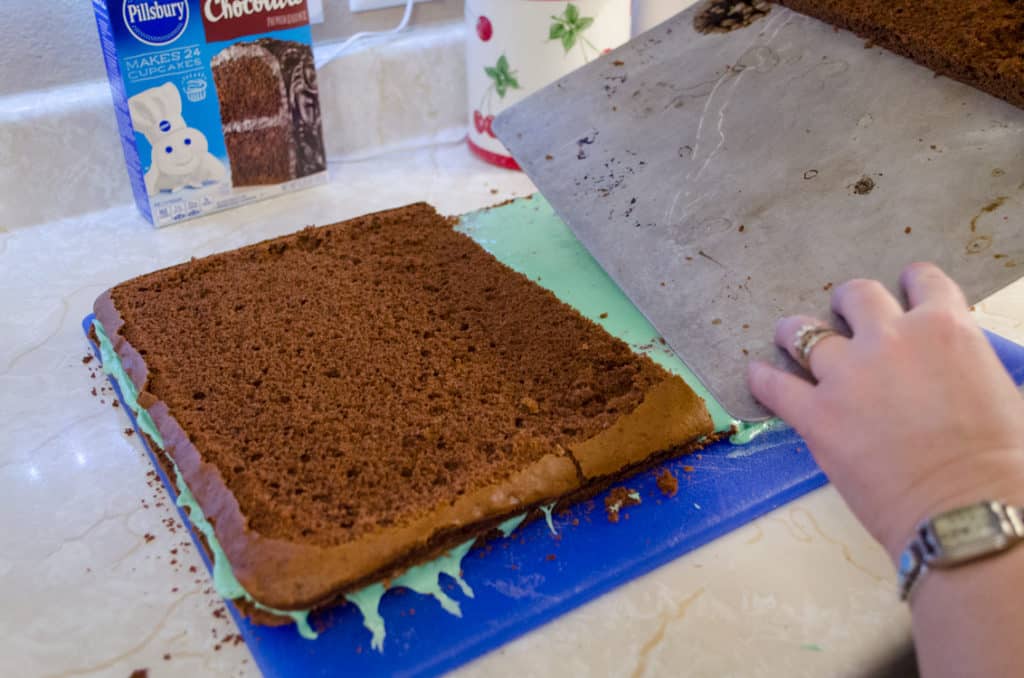
Remove the lid from the frosting container and pull out the foil seal. Place in the microwave uncovered for about 15 – 20 seconds for your instant frosting glaze! Now the frosting should be runny enough that you can just pour it over the top of the cake. If not, pop it in for a few more seconds. Spread it as super evenly as possible. You will eventually be covering it again with frosting ‘glaze’ and you want the top of your petit four to be nice and smooth. Now place the whole cake into the freezer for at least 1 hour.

Once the cake is frozen, remove it and slice off the edges with a knife and discard them (or eat them later). You’ll need to work quickly here and slice the cake into 1″ rows, then into 1″ squares. The cake will cut very precisely when frozen with little crumbling. Place parchment paper under a cooling rack and place several cakes on the cooling rack. Warm up more frosting ‘glaze’ in the microwave and drizzle it over with a spoon, making sure to cover the sides and corners of the petits fours. The excess glaze falls onto the parchment and is then easily scraped back into the frosting container for reuse!
Add the funfetti sprinkles on top while the glaze is still warm. I used tweezers to carefully place the ones in my photos. But you can just sprinkle them all over, it’s whatever you prefer! When my cooling rack is full of frosted and decorated cakes, I like to pop it in the fridge for about 20 minutes to help the frosting set up before I remove them. Slide a knife under each cake and place it over a mini cupcake liner that has been flattened a bit. Push the cake off of the knife with a fork or spoon into the paper liner. Store your little masterpieces in the fridge or freezer until you’re ready to gift them away.
[convertkit]
Tie a festive ribbon around your container of treats for an extra ‘wow’ factor!
Comments? Questions? I love hearing from my fabulous readers! I know you’ll enjoy making these adorable, Easy Holiday Petits Fours. Make it a family affair and create some cherished holiday memories with the special people in your life. Happy Holidays everyone!

Easy Holiday Petit Fours (mini cakes)
- Yield: about 75 1x
Description
These adorable little confections will be a hit at any holiday party or make a memorable gift.
Ingredients
- 1 Box of Pillsbury Moist Supreme Chocolate Cake mix
- 1/2 cup butter
- 1 cup milk
- 3 eggs
- 2 Containers of Pillsbury Holiday Frosting with sprinkles
- 1 Jar of strawberry or raspberry preserves
Instructions
- Set your oven to 350 degrees F. Make cake mix according to directions on the box, substituting the milk for water and butter for oil. Line a 13 X 9 inch rimmed baking pan with parchment paper and spray the sides. Pour in cake batter and bake for about 30 mins or until a toothpick inserted in the center comes out clean. Cool cake in pan for 30 mins.
- Remove cake by placing parchment paper over the top and a flat baking sheet. Holding onto all with both hands flip over and cake should easily release. Pull top layer of parchment off and place a large cutting board over top. Flip again so the cake is resting on the cutting board. Remove parchment paper.
- Using floss or a cutter, slice cake in half horizontally creating two very thin layers. Slip a flat cookie sheet under the top layer and remove.
- Spread a layer of fruit preserves (strawberry or raspberry) over the bottom layer. Replace the top layer of cake. Frost the top with funfetti frosting as smoothly as possible. Freeze the cake for at least 1 hour.
- Working quickly, slice the edges off the cake, then slice cake into 1″ rows, then into 1″ squares. Place the squares on a cooling rack set over parchment paper.
- Remove lid and seal from frosting container and microwave for 15 to 20 seconds to create frosting glaze. Spoon glaze over each cake, ensuring all sides and corners are covered. Sprinkle tops with decorations. Chill the entire rack with cakes on top in the fridge for 30 mins.
- Remove cakes with a knife and place cakes into paper liners. Cover and store cakes in fridge or freezer for up to 1 week.
- Category: dessert
- Cuisine: French