The Complete Time Charts for Instant Pot Chicken Breast
Boneless, skinless chicken breasts are viewed as little devils in the culinary world. Why? They are notorious for being difficult to cook and rather bland- they lack fatty tissue, bone, and skin, which all give flavor and moisture to meat. They also don’t cook evenly because a chicken breast can be really thick on one end and paper-thin on the other.
However, they are the healthiest and leanest part of the chicken making them desirable for those trying to watch their waistline. So we put up with the little devils.
Many folks think the Instant Pot should be an easy fix for this troubling cut of meat, right? Well…. some are disappointed with the results and have turned to Google for answers. If this is you, I guarantee you will cook better instant pot chicken after reviewing this article. So read on for better-tasting IP chicken! 👍
The average size of the chicken breast pieces is much more important to determine the Instant Pot cooking time, not the number of pieces you are cooking in the Instant Pot.
The Goldilocks Kitchen
Raw Boneless Skinless Chicken Breast Instant Pot Cooking Time Chart
| Average Weight | Cooking Time |
| 7-9 ounce pieces (small) | 6 minutes |
| 9-12 ounce pieces (medium) | 8 minutes |
| 12-14+ ounce pieces (large) | 10 minutes |
A Quick pressure release is recommended immediately after cooking is finished – natural release is likely to overcook chicken breast.
Frozen Boneless Skinless Chicken Breast Instant Pot Cooking Time Chart
| Average weight | Cooking Time |
| 6-8 ounce pieces (small) | 12 minutes |
| 9-11 ounce pieces (medium) | 14 minutes |
| 12-14+ ounce pieces (large) | 16 minutes |
Raw Skin-on, Bone-in Chicken Breast Instant Pot Cooking Times
| Average weight | Cooking Time |
| 10 – 14 ounce pieces | 10 minutes |
| 16+ ounce pieces | 12 minutes |
Frozen Skin-on, Bone-in, Chicken Breast Instant Pot Cooking Times
| Average weight | Cooking Time |
| 12-18 ounces | 25 minutes |
As you may have noticed, I have disclaimers under each chart to remember, the bottom line is that you want the thickest part of the meat to register at least 165℉, so please use a food thermometer to check your meat. Even though my repeated tests all came out fine, chicken breasts can vary widely in today’s supermarkets. An inexpensive food thermometer could save you a trip to the hospital, here are the ones I recommend.
Here’s a great resource about food thermometers and instant pots: https://blog.thermoworks.com/thermometer/thermometers-and-multi-cookers-what-you-need-to-know/
I spoke with Instant Pot experts employed by the company and they shared some great tips about cooking chicken breasts in the IP:
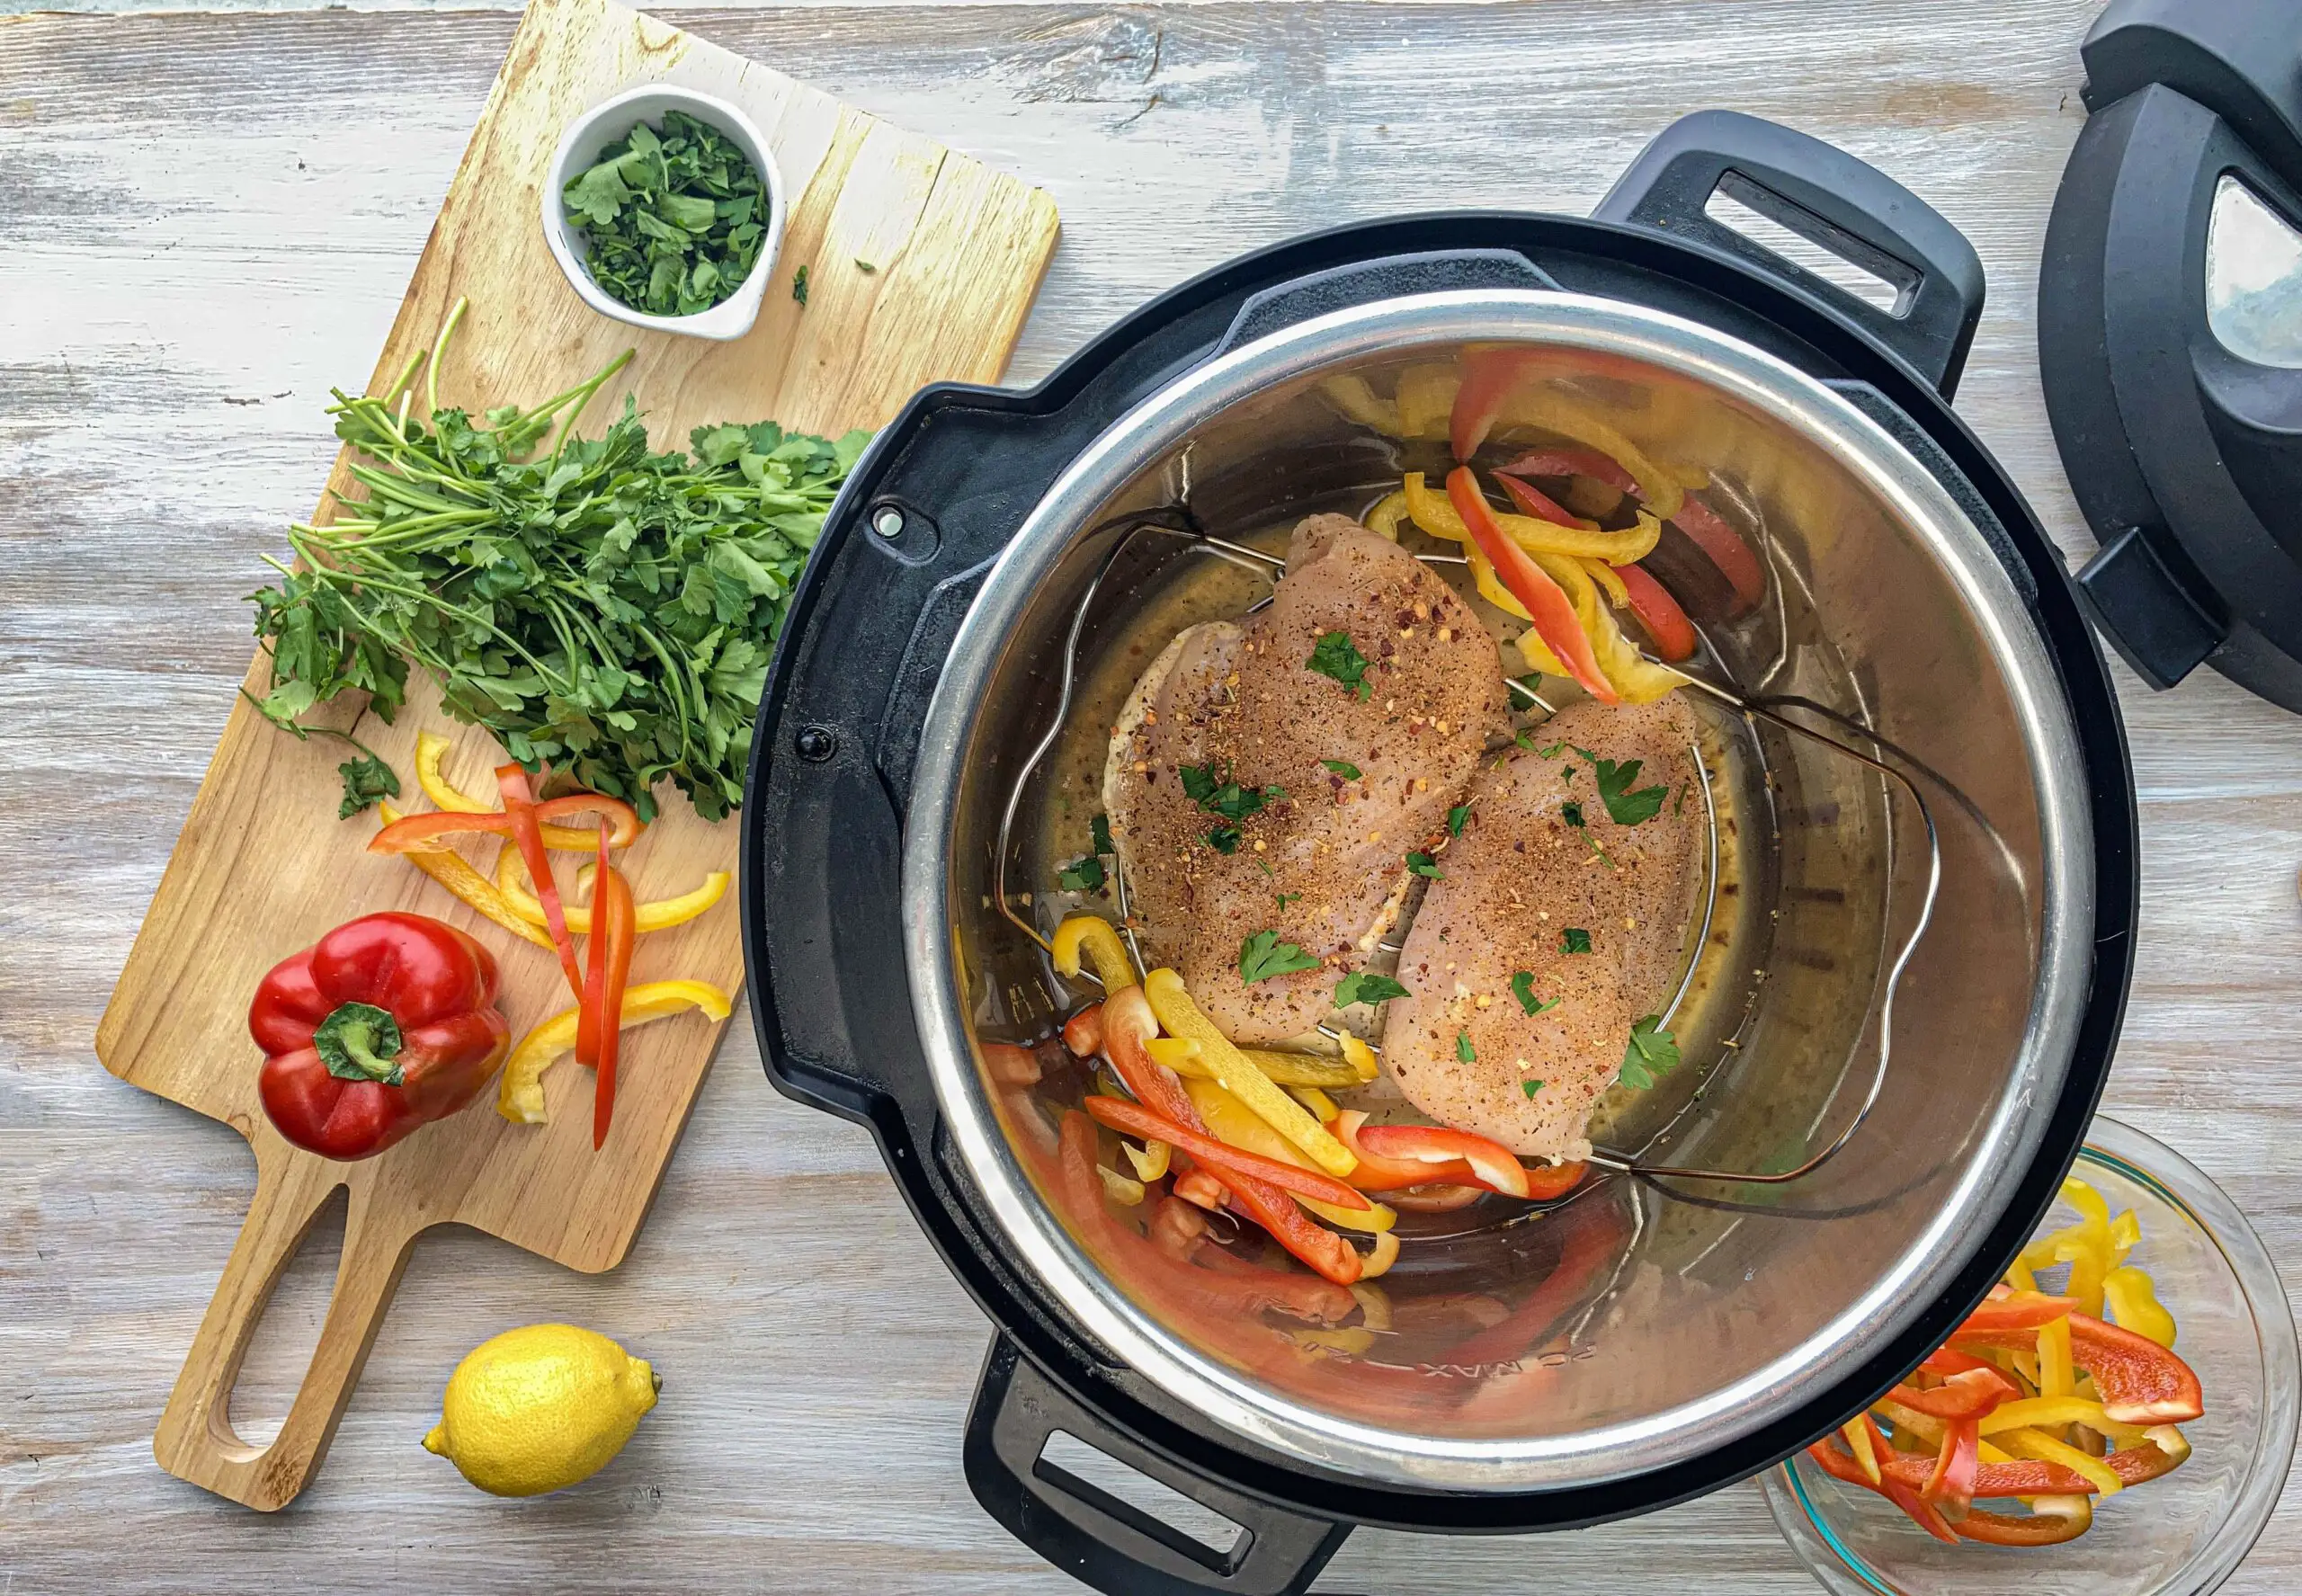
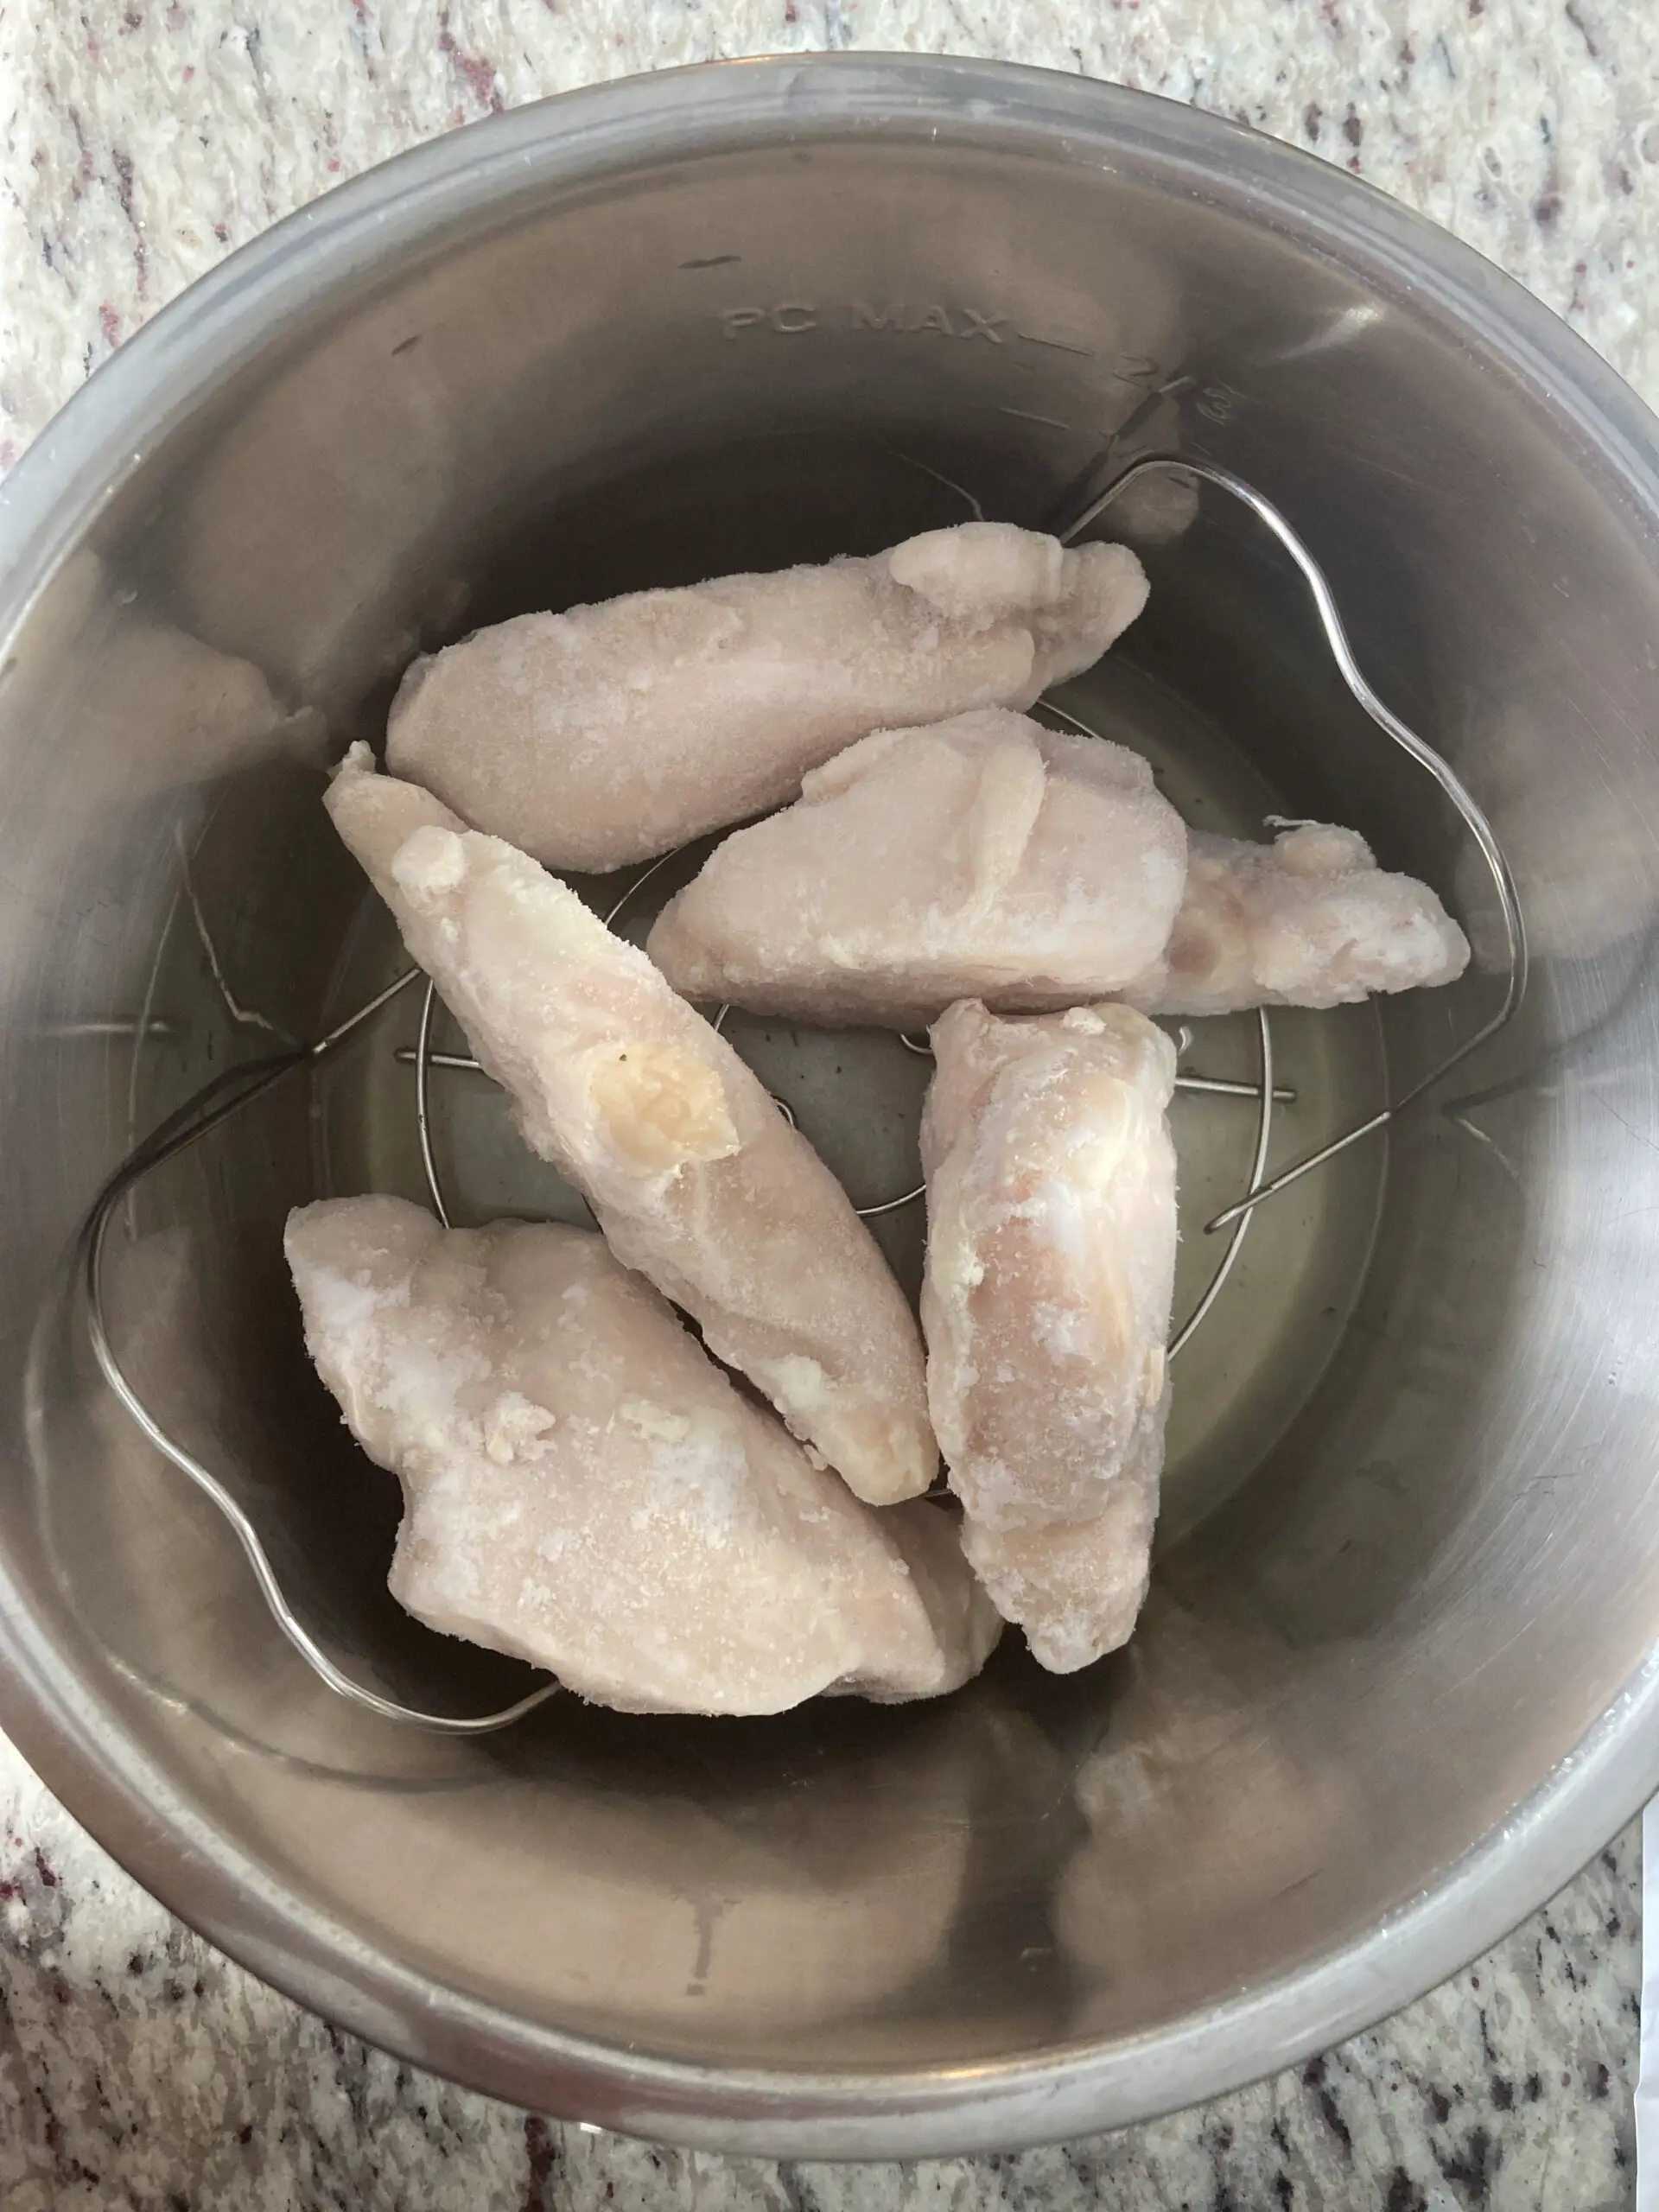
You can cook as many as you want as long as they fit inside the inner pot and as long as they do not exceed the PC Max line… we suggest you use the stainless steel rack to elevate the chicken breast to avoid scorching at the bottom.
Carlo, Instant Pot Customer Service
The Instant Pot cooks food with heat and pressure created by steam from the liquid you pour into the bottom. The pressure cook timer will only begin once the machine has reached the proper internal pressure and temperature. The amount of food you put in there won’t change the cooking time, it just changes how long it takes for the IP to reach the correct pressure and temperature before beginning the countdown.
Need to Know Info Below on Cooking chicken breasts in the Instant Pot
Trivet or no trivet?
Instant Pot told me directly that the trivet is included with all Instant Pots because it prevents scorching on the bottom. Some folks love pressure cooking meat directly in the liquids on the bottom, just know you run the risk of the dreaded ‘burn’ icon.
Can you overcook chicken breast in an Instant Pot?
Yes, you can! Pressure Cookers don’t work the same as slow cookers, where longer cooking times equal more juicy and tender meat. Too much time in a pressure cooker will create dry tough meat.
Does altitude affect cooking times for my Instant Pot?
Yes, it does! Pressure cookers, including Instant Pots, need more cooking time the higher in elevation they are. 0-4000 feet, the difference is negligible. But if you are 5000 feet or higher add 1 extra minute to the cooking time. IP Ultra and Max models can be permanently customized to your specific altitude.
What internal temperature is best for chicken breast?
165℉ is the USDA-recommended temperature for chicken breast meat. The higher you go above this the more dry and tough your chicken will be. It is so important for every home chef to own a food thermometer for safe and accurate cooking. (These are the best.)
Why is my Instant Pot Chicken rubbery?
If your chicken is rubbery it’s overcooked. Choose to cook chicken breasts that are similar in size and weight to ensure the cooking time is appropriate for your IP chicken. An inexpensive kitchen scale is extremely helpful in preventing overcooking IP chicken breast meat.
How much liquid do I need in the bottom of My Instant Pot to correctly cook chicken breasts?
A 6-quart Instant Pot will need 1 cup of water or broth.
An 8-quart Instant Pot needs 1 1/2 cups of water or broth.
The size of your Instant Pot is listed on the little sticker in the back under “Volume”.
Can I load up my instant pot with lots of chicken for batch-cooking?
There is much controversy online over cooking chicken breast meat this way. Some say the chicken will cook unevenly. Instant Pot told me that it’s fine to batch-cook chicken breasts as long as you don’t load chicken higher than the “Max PC line” and use the trivet to keep the chicken from scorching on the bottom. Also staking the chicken in a criss-cross pattern, or placing (frozen) chicken vertically will help the steam to circulate more effectively around the meat. Temp-check all pieces when done!
Is pressure-cooking chicken healthy?
Pressure-cooking chicken is the most healthy way to cook chicken! It doesn’t require any oils or ‘fats’ to cook, like sauteing does. The pressure and temperatures inside are also great at killing bacteria that might be lurking in your chicken.
Is quick release or a slow pressure release better for chicken breast meat?
My research has shown that quick-release is best for chicken breast meat only, because it is so easy to overcook, unlike other meats which do benefit from a natural release. Other bloggers have corroborated these results and this quick-release method is incorporated into the cooking charts below.
Does the size of my Instant Pot change the cooking time?
Thankfully, no. The cook times will be the same whether you have a 3, 6, or 8-quart pressure cooker.
Size of chicken breast pieces vs. total weight of meat you’re cooking.
The amount of chicken you place into your Instant Pot to cook shouldn’t affect the cooking time. It’s the size/thickness of the pieces that determine your cooking time. Find the right cooking time for your chicken using one of the handy charts I have included.
Methods and research results
The tables above are a combination of recipe testing using the following; a kitchen scale, Thermoworks food thermometer, researching through countless forums online, studying Instant Pot cookbooks, info from the Instant Pot website, and speaking with Instant Pot directly.

After testing several batches of chicken breasts in the instant pot myself, I quickly realized the cooking results depended on four main factors:
- Cooking pieces that were similar in size and weight
- How thick the chicken pieces were
- A quick release of pressure (after cooking has ended) helps the chicken breast avoid being overcooked.
- Using the ‘keep warm’ feature dries out the meat. (Unless it is covered with liquid.)
- Rest your meat after cooking to allow the juices to settle down into the meat (re-condense).
1. Cook pieces that are similar in size and weight
When you cook similar-sized pieces of chicken breast, they will cook evenly- meaning they will all reach 165℉ at approximately the same time and you will know how long to cook them for in the IP.
If you are in a hurry and dump multiple pieces of meat in the pot that vary greatly in size, then you’ll need to set the timer to cook for the largest piece of chicken to ensure that it will be fully cooked. In the meantime, all the smaller pieces will be overcooked and dry.
2. How thick the chicken breast pieces are
When I cook chicken breast meat in the Instant Pot, I don’t bother to thin the meat at all. I will simply adjust the time up or down by one minute if the chicken is exceptionally thick or thin.
There are a few ways to deal with the ‘thick and thin’ of chicken breast meat if you want to tackle the problem- my preferred method is to pound the thick side thin with a mallet because pounding also tenderizes the meat. If you do this, your chicken breast becomes thinner, and you’ll need to adjust the IP cooking time to be less to accommodate.
You can also slice horizontally through the thickest part to create two thinner pieces, (again adjusting the IP cooking time to be less) or try slow-cooking the chicken breast meat in a liquid (like for stew or soup) in which you fish it out when it’s done, rest it, and slice or shred it to stir it back in.
I have done each of these methods multiple times, and even the last one I have done with the instant pot and just used shredding scissors to shred the meat right in the pot for the stew. Never heard of shredding scissors? They are the best kitchen tool ever! Check them out here.
3. A quick release of pressure is best
Instant Pot will tell you that you should always allow for a 10-minute slow pressure release first, then a quick release, when cooking meats. This does not work for chicken breast.
Other food bloggers have discovered this so I won’t take any credit for it, but I have confirmed their results myself. You WILL overcook your chicken breast meat by a whole lot if you do this. Plan on a quick release of pressure for chicken breasts whether fresh or frozen for juicy perfectly cooked chicken!
4. Don’t use the ‘keep warm’ feature when cooking chicken breast meat on the stainless steel insert rack
Likewise, the ‘keep warm’ feature will also overcook your chicken breasts and dry them out if you leave them in the IP for any decent amount of time. I try to get into the habit of always turning it off unless I specifically plan to use it.
5. Rest your meat, even after cooking it in an Instant Pot
The science of ‘resting’ your meat works by allowing the moisture inside the meat to condense from steam back to liquid. However, if you cook too much moisture out it won’t go back in.
What is the Instant Pot Best For?
I was shocked when I opened my new Instant Pot for the first time because it came with basically NO instructions about the ‘fancy buttons’ or a “cooking times” chart. Perhaps you had a similar feeling?
Hearing all the hype, yet being naive, I was hoping to quickly cook my food and then the machine would just ‘detect’ when my food was done and turn itself off. NOPE. It doesn’t do that.
People love the Instant Pot because it cooks faster than other methods, especially beans and rice; both being cheap and fairly healthy foods that are going to save money on the grocery bill. I use mine at least twice a week to cook my family yummy and healthy dinners. However, cooking in an Instant Pot is also no different than cooking food in an oven, a Microwave, or a slow cooker, because YOU ultimately are responsible for cooking the food to your liking, i.e. to your taste. The Instant Pot is simply another method for cooking food- a fast one- which makes it so popular in our modern society.
As much as I’d love the Instant Pot to have some kind of fancy internal thermometer/sensor to recognize when your food is perfectly cooked and turn itself off, it does not. The instant pot has no fancy sensors in it other than a pressure sensor and a thermometer to measure the temperature inside the pot, NOT the temperature of the inside of your food.
The Instant Pot has “Smart Program” buttons that come pre-programmed with the average times and best heating profiles for different types of food, but there are no magic sensors in those buttons to tell you that your food is done. Here’s what Instant Pot said about it:
This is just a simple recipe suggestion, but you can still not follow the time or you can tweak the steps. The result provided may not suit what you like; results may be under-cooked or over-cooked. It will still be based on your judgement.
-Denmark, Instant Pot representative
Don’t get me wrong, I still love using it for many reasons, speedy cooking being the most awesome reason, but I also love the saute feature, the homemade yogurt feature, and being able to cook steel-cut oats in it without slaving over a hot stove stirring my arm off. I always recommend that any home cook should have a food scale and a quality food thermometer to ensure the best results for cooking meat, no matter what method of cooking you choose.
Here are a few more fantastic resources for using the ‘smart mode buttons’ on your instant pot:
Go to https://www.instanthome.com/support/instant/resources then scroll down on the left to find “Cooking Program Options”. Then click the carrot on the right side of the screen (wide ‘v’ looking symbol) to extend the drop-down menu for details on how to use all the ‘smart program buttons’ your instant pot has.
And here’s an in-depth blog post written by blogger Ann Fabrizio over at Instant Pot Eats detailing the Smart Program Buttons on your Instant Pot. https://instantpoteats.com/instant-pot-settings-buttons-explained/
How to Make Pressure-Cooked Chicken Taste Great
1. Saute the outside first- This will add some great flavor to bland chicken breast meat- use the ‘sear’ function and brown the chicken in a little oil with some seasonings before pressure-cooking it. Searing the meat will partially cook it, so you can reduce the amount of pressure cook time by one or two minutes to avoid overcooking it.
Turn on the Instant Pot and select the “Saute” function. Allow the pot to heat up, then add a small amount of oil to sear the Chicken. Sear the chicken for 1-2 minutes on each side to enhance flavor. This step is optional but adds extra depth to the taste.
Pour in 1 cup of chicken broth or water to the Instant Pot. Scrape the bottom to ensure there are no bits stuck, then pressure cook.
Denmark, Instant Pot Customer Service
2. Brine baby brine- You may be familiar with brining if you use the method to prepare your Thanksgiving turkey. Once you try it you’ll never go back. It’s fantastic at turning lean lifeless turkey meat into juicy delicious turkey meat.
You can totally apply the same principle to your chicken breast meat. This method works especially well when you need to cook a large batch of chicken to shred for meal prep. Just don’t forget to rinse the brine off before pressure cooking, and apply your favorite seasonings to your chicken breast meat before placing in the Instant Pot.
3. Season your meat– This doesn’t have to be scary, just sprinkle some salt and pepper over the meat, or try sprinkling on some of your favorite seasoning blends before cooking. I use boatloads of Weber’s “Kicken’ Chicken” because my whole family loves it!
Meal prep chicken for the week with batch cooking
Can you place too much chicken into an instant pot? How much can you cook at once? Thankfully, my source at Instant Pot gave us the answer to these questions:
You can cook as many as you want as long as they fit inside the inner pot and as long as they do not exceed the PC Max line.
Carlo, Instant pot representative
Batch cooking a bunch of chicken at the beginning of the week is extremely helpful, not just for having a quick dinner ready on those busy weekday nights, but it’s also great for the budget! I cook it, shred it, and store half in freezer bags for the latter half of the week. I save so much money when I don’t serve a slab of meat as the main course in an entree. Meat is expensive.
Combining shredded chicken into soups and casseroles, I can stretch it out over multiple recipes, like The Pioneer Woman’s classic Chicken Spaghetti bake, my easy Chicken and Biscuit bake, or some simple chicken and cheese quesadillas for an after-school snack!
I have had success loading frozen chicken breasts into the instant pot vertically, rather than horizontally. This allows the steam to be able to freely move around the meat more and cook it evenly. The one drawback is that you can’t add much seasoning to the meat unless you purchase it raw, season it, and then freeze it with seasoning on it.
Easiest Hacks for shredding lots of chicken
Stand Mixer shredding is an excellent hands-off method to quickly shred a whole lot of chicken. Simply place cooked and cooled chicken in the bowl of a stand mixer with the paddle attachment placed on the stand mixer. Turn it on to medium slow, and watch the magic happen!
If you like smaller, finer shreds of chicken, cut the chicken pieces in half or thirds before adding it to the stand mixer.
Shredding scissors are my absolute favorite kitchen tool. They are supposed to be for salads, but I use mine mostly for meat. When my recipe is done, say I’m cooking chicken and rice or green chile chicken stew, I simply open the lid and shred the meat right in the pot with my shredding scissors and keep from dirtying extra dishes!
Looking for an official quick reference cooking time chart from Instant Pot? Here are two of them!
Here are two official charts from Instant Pot. The first is a handy printout if you can print double-sided: https://instantpot.com/wp-content/uploads/2018/08/12PSI-EPC-Cooking-Time-Tables-English.pdf
This one is several pages long but has more detailed information: https://instantpot.com/instantpot-cooking-time/#tab-id-4
I hope you found this article helpful, if you did, or have more info to add, please drop a comment below! I love to hear from my readers.


One Comment