DIY Chocolate Sparkle Candies
Sparkly chocolate. How cool is that?! And you can totally eat it too :0) Creating these little DIY Chocolate Sparkle Candies was a blast. What could be better than chocolate and glitter????
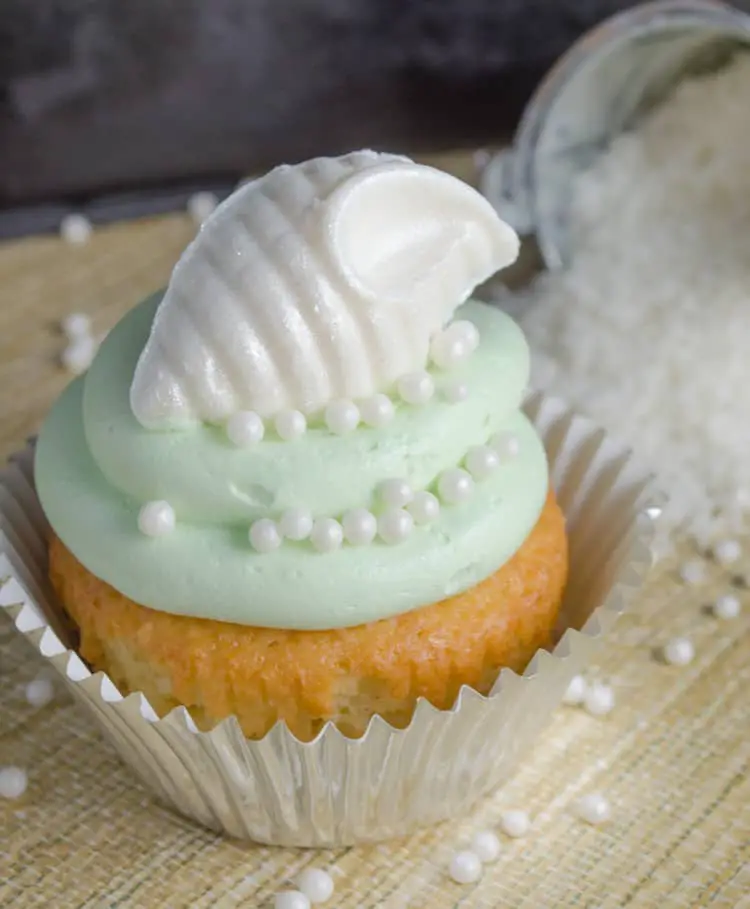
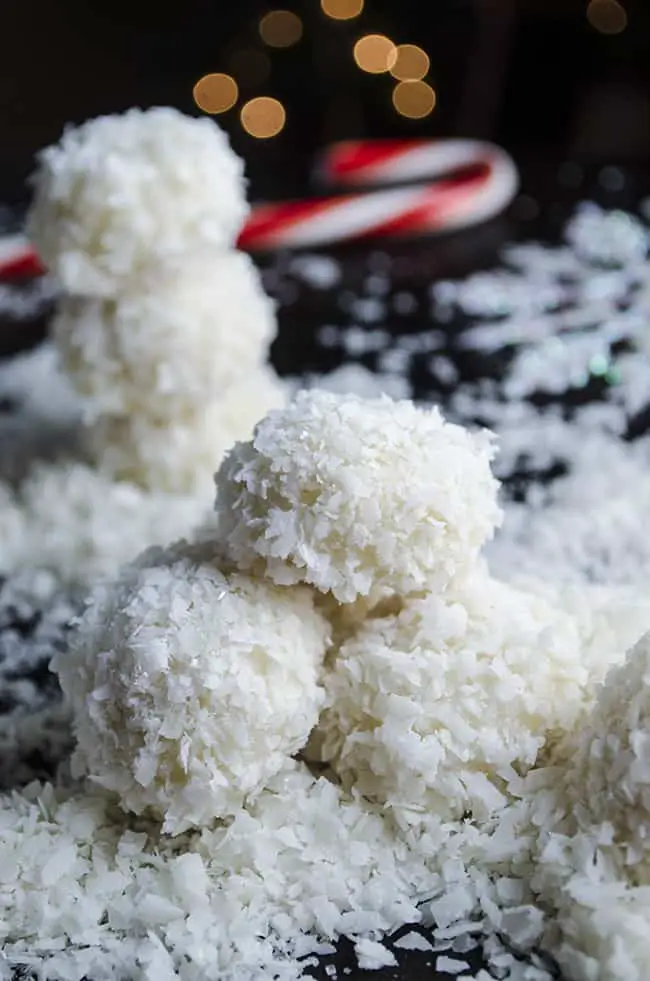
DIY Chocolate Sparkle Candies make a beautiful addition to cakes and treats.
I created these white chocolate-coconut flavored candies as a cupcake topper for the Coconut Dream Cupcakes I made a couple weeks ago. They were super easy; I thought I would give a little tutorial for you, my fabulous readers, so you could share in the joy too! They tasted delicious, especially because they’re spiked with toasted coconut flavoring. Nom nom nom nom…
I’m lucky enough to live in an area where I can shop two different crafts stores for supplies; super helpful since to create these I did end up using products from both stores. No craft stores near you? No problem. All the items I used can be purchased online. Yay!
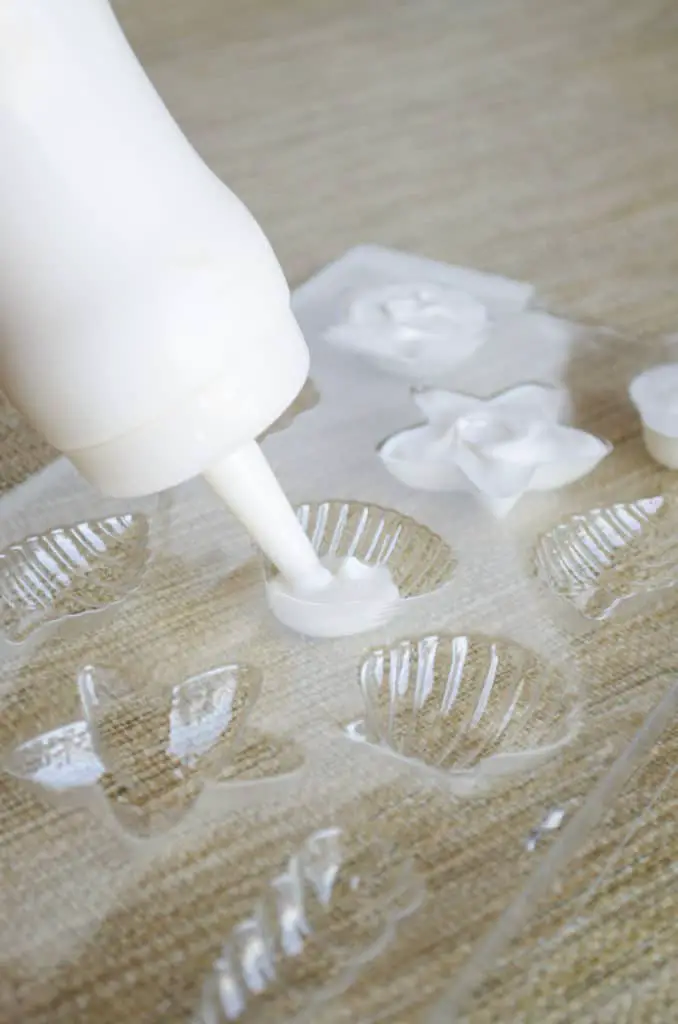
So I started out with a Seashell Wilton Candy Mold. Feel free to use any mold you wish! Grab a bag of Wilton pure white candy melts and measure out one cup full and pour into a microwave safe bowl. Add one tablespoon of coconut oil, a few drops of Wilton Toasted Coconut flavoring extract, and a few drops of oil-based food coloring for extra fun. Gently melt in the microwave, cooking 30 seconds at a time and stirring in between until fully melted. I placed my melted chocolate into a tapered squeeze bottle to neatly fill the molds. If it starts to cool too much and won’t squeeze out properly, just unscrew the lid and pop it back in the microwave again for a few seconds.
If you’d like to make these without a coconut flavor, simply substitute shortening instead of coconut oil, and add a flavoring of your choice, (or none at all) as long as it’s an oil-based extract. Just make sure that there’s no ‘water’ listed on the ingredient list. Melted chocolate and water don’t mix! Don’t add water, or allow the melts to get wet at any time, or the chocolate will seize. It’s also imperative that you melt it slowly on medium or half power in the microwave or it may also seize.
Once filled you’ll need to tap the bottom on your work surface to get rid of bubbles. Gently lift the chocolate filled mold a couple inches and let it drop. Do this several times and you’ll see bubbles rise to the surface almost immediately. Repeat until you don’t see any more bubbles. Now pop your chocolates into the fridge to chill for 30 minutes.
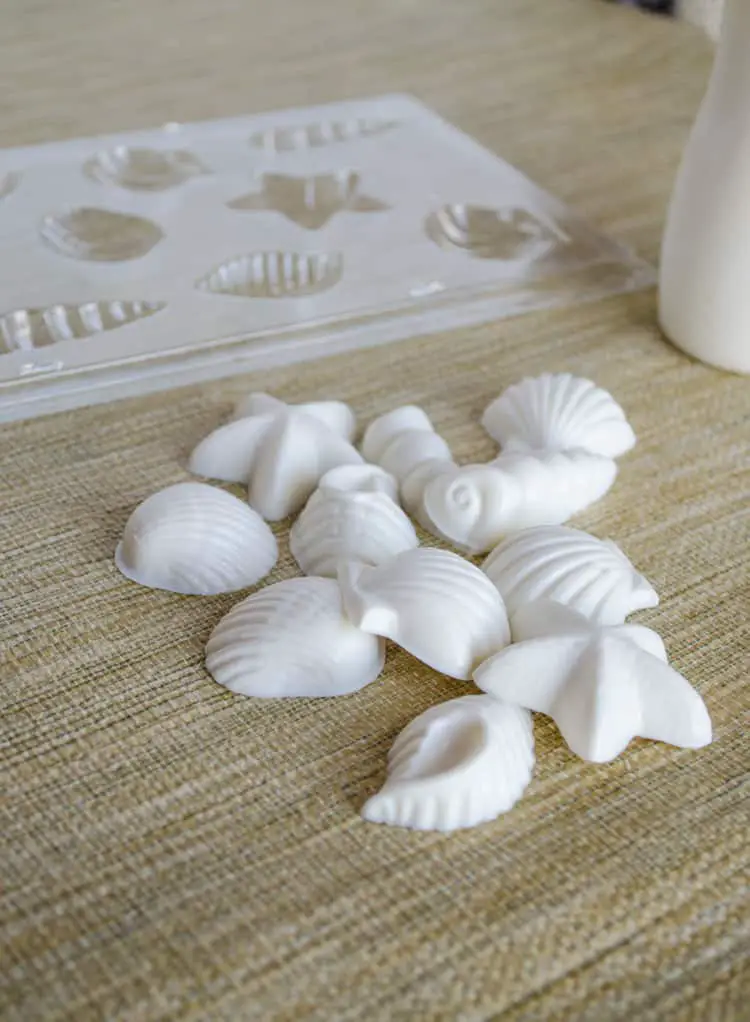
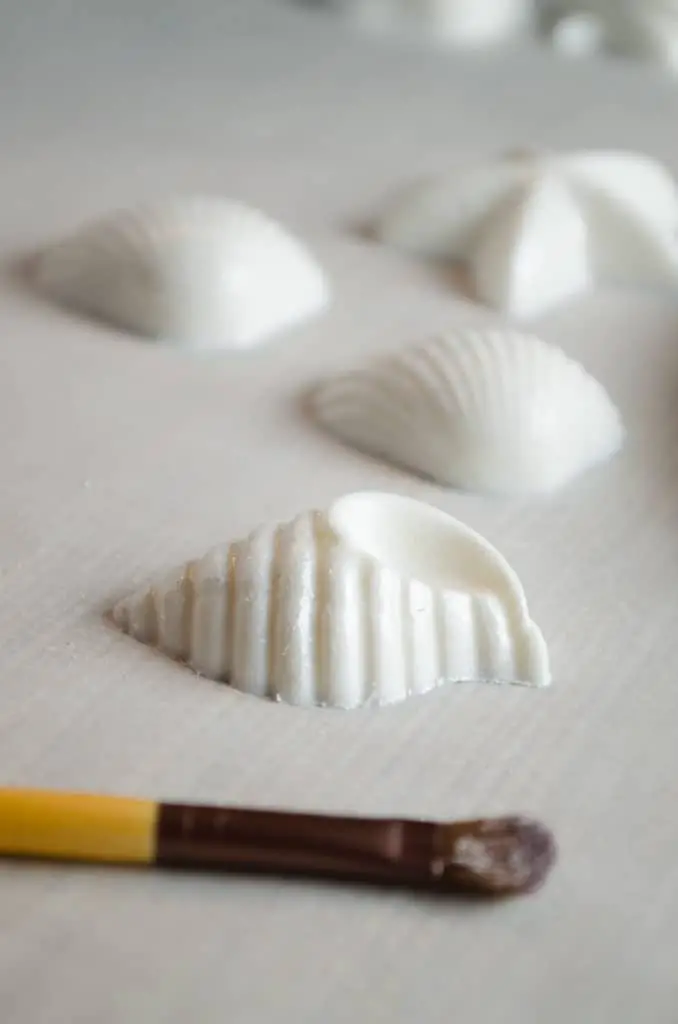
These candies will easily fall right out of the molds with just a little tapping and turning of the plastic. Now you have pretty little chocolates all ready for luster dust!
Luster dust. The name says it all. However, you may find this edible item going by a different name at your local craft store. Just make sure it’s in the cake or candy isle and it should say the word ‘edible’ on it somewhere. I used a white pearl color, but it comes in a variety of colors.
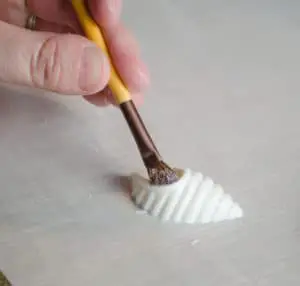
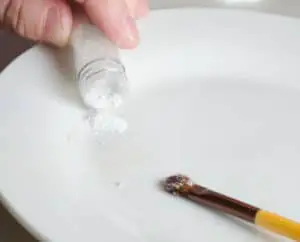
So there are a few different methods for applying luster dust to things, and what they are determines the best way to go about this. Since we’re applying this to cooled chocolate, a dry brush works great. I went out and purchased a cheap makeup brush to use just for these candies. Make sure it’s more of a fuzzy brush than a tapered brush and that it’s sanitized!
Simply tap a small amount of dust into a container, blot your brush in it, and ‘paint’ or ‘blot’ it on, dry as a bone. It doesn’t work any better on these chocolate candies if it’s applied wet with water or food grade alcohol. I was very conservative with the luster dust at first, but once I got the hang of it, I was using it judiciously. It came in such a tiny container I wasn’t sure if I’d have enough at first. I ended up using only about 1/4 of it for 34 candies!
So here’s a pic of the finished product. Pretty cool. I’m not usually much of a craft person, but I really did enjoy creating these DIY Chocolate Sparkle Candies. Maybe because they’re a sweet treat (and I love all sweets). Just imagine the possibilities with different shapes, food coloring and colors of sparkly dust you could use. And don’t forget to add some flavoring extract for that gourmet touch! Enjoy :0)
Print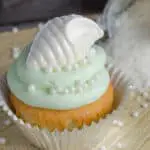
DIY White Chocolate Candies
- Total Time: 35 minutes
- Yield: 34 1x
Description
These little shimmery chocolates are a beautiful addition to any dessert. Just melt, mold, and paint.
Ingredients
- 1 bag of Wilton bright white candy melts
- 1 plastic candy mold
- 2 tablespoons of coconut oil or Crisco shortening (one per batch)
- 1 small bottle of Wilton Treatology Toasted Coconut Flavoring
- 1 container of luster dust
- oil-based food coloring (optional)
Instructions
- In a microwave safe bowl, pour in one cup of candy melts, 1 tablespoon of coconut oil or shortening, coconut extract and (if using) a few drops of food coloring. Microwave on MEDIUM OR HALF-POWER for 30 second shots, stirring each time until the chocolate is melted and coconut oil is fully incorporated. (If you wish to add more food coloring, mix it in now.)
- Place melted chocolate mixture into a squeeze bottle and screw on lid. Gently squeeze chocolate into each mold filling just to the top.
- Lift the mold about 2 inches from the tabletop and carefully let it fall. Do this several times to get all the bubbles out of the molds.
- Chill mold for at least 30 minutes, then turn it over and pop the chocolate candies out. You can repeat steps 1 thru 4 to create more candies.
- With a sanitized brush apply the luster dust to the chocolates by dabbing it on dry. Store the finished candies in the fridge.
- Prep Time: 5 minutes
- Cook Time: 30 minutes
- Category: dessert
Nutrition
- Serving Size: 1
Hi there
Thanks for the post. Just a quick question… why do you use the coconut oil? Does it help ‘set’ the chocs or do you add it for flavor (as i noticed you also added coconut extract). I want to also make some but not with a coconut flavor.
Thanks
Melanie
Hi Melanie, thanks for the question!
The coconut oil serves two purposes~ one is for flavoring, and the other is simply to make the chocolate a little thinner so I can squirt it into the molds with my handy bottle. You could substitute butter or Crisco instead if you plan to use a squirt bottle like mine, or just leave the oil out all together and the chocolate will be a bit thicker but could be drizzled into the molds with a spoon. Good Luck, I’m sure they’ll turn out fabulous!
I plan on making very small heart shaped mints. Could I put the dust and mints in a bag & shake the dust over the entire mint?
Hi Karen,
That sounds so cute! I’d definitely give that a try and see if that works. It would probably depend on the texture of the mints as to how much dust will stick. I’m super curious how it turns out, will you follow up and let me know?
How long do they last? Just wondering how soon before my party I can make them. Do you store them in the fridge?
Hi Rochelle,
Yes I make mine ahead and store them in a large tupperware with a well fitting lid. They could last for weeks in there :0) Good luck with your party!
I just tried making these, the minute I added the flavoring my chocolate got putty thick! Did I do something wrong? I didn’t use oil, but in a comment you said to someone it could be drizzled with a spoon. I did it that way when I made the batch with no flavour added. But with flavour added it was like spackling a hole in your wall then smoothing it out. The final result wasn’t very smooth.
Oh no, I’m so sorry Rochelle! It sounds like your chocolate ‘seized’ (becomes clumpy/grainy). This is common (and sooooo frustrating) when working with melted chocolate. Did you warm the flavoring and the chocolate together in the same container? Or did you add the flavoring afterwards to the melted chocolate? The oil, chocolate, and flavoring must be warmed in the microwave all at the same time. If you add anything to the chocolate after it’s been melted it will likely seize. It can be salvaged, but it may be good only as a chocolate sauce for ice cream. Check out this article from cooks illustrated on how to ‘fix’ the chocolate: https://www.cooksillustrated.com/how_tos/5712-how-to-fix-seized-chocolate
I did it both ways. Adding after was worse but it still wasn’t thin together. This may be because I forgot to add oil but there was no drizzling. That said the chocolates still tasted great.
One last quick question: Did you use candy melts or white chocolate chips? I know I’ve stated both in my recipe, just curious about that. I’m thinking that when using chocolate chips, the shortening/oil may be necessary, where as it’s not necessary with the Wilton Candy Melts. I didn’t realize this in my earlier comment to Melanie when I said the oil could be left out. Also, what type of food coloring and flavoring were you mixing in? I just learned that oil(or fat)-based extracts should be used instead of water-based. Check the back label and if you see the word ‘water’ anywhere, don’t use it in this recipe. I will amend the post and recipe to add all this new info from our conversation. Hopefully all this hasn’t discouraged you from trying again, and I apologize for not doing more research on chocolate melting before I wrote this up! I’m learning along with you :0) I used candy melts, coloring, flavoring and shortening and the chocolate was runny enough for a squeeze bottle. ( I did cut the tip off so the spout would be a little wider than normal.)
My husband told me to cut the top off but I didn’t want to wreck my bottle lol he just gave me an “I told you so” uh huh. Lol
It was Wilton Candy melts I used. I have a feeling it was my flavoring. It was just your basic spice asile imitation flavouring. First ingredient water.