Pumpkin Pie From Scratch
One Taste of Pumpkin Pie From Scratch and You’ll Never Want Store-Bought Again

Pumpkin pie from Scratch. The iconic American holiday dessert. What more can be said about it that hasn’t already been said?
Well, a lot! Have you ever tasted a store-bought pumpkin pie? With its soggy crust and grainy, overbearing one-note flavor? Oh pumpkin pie, how you have fallen! This desert was once a light creamy custard with a crisp crust and a symphony of flavors harmonizing with the pumpkin puree. It’s time to restore this quintessential holiday dessert back to its former glory. It starts by creating your own at home in the kitchen. If you’d like to know how read on!

Let’s start with the crust.
You can purchase ready made single-crust pie dough, make your own favorite recipe. Better yet, try my favorite Foolproof Pie Crust.

I like to use a french style rolling pin for pie dough because it’s long enough to roll up the pie dough and still have space on the ends. But any longer-style rolling-pin will do. Rolling the dough onto your pin and then rolling it out over the pie plate will help keep the dough from ripping. If you are using my Foolproof Pie Dough recipe, sprinkle at least two tablespoons of flour onto the surface where you will be rolling out the dough. It’s more moist that traditional pie dough. I also make sure my rolling pin is dusted with flour to ensure that the dough won’t stick. You’ll need to work quickly, when the dough is pliable but still cold. If it warms too much it will become sticky even if you use a lot of flour.
Following the pictures, place your pie dough in the the plate and create a decorative edge. Set it in the fridge for 30 minutes while your oven is heating. You can move on to prepping the ingredients for the filling.
 |
| Slowly roll the pastry dough onto your rolling pin. A bench scraper comes in handy if the dough sticks to the surface. |
 |
| Gently unroll the dough over the pie plate. There should be at least 1/2 inch over hang all around. |
 |
| Trim any overhanging dough that is longer than 1/2 inch. |
 |
| Tuck or fold the edge of the dough under 1/2 inch. |
 |
| Create a decorative fluted edge all around with the index finger of one hand and the thumb and index finger of your other hand, as shown. |
In order to achieve a properly crunchy pie crust that will stay that way, the dough needs to be pre-baked while you’re creating the filling. This way, the warm pie shell and hot filling you pour in will set the custard quickly and prevent it from soaking into the crust and making it soggy.
When you’re pre-baking a pie shell, you must way the down the dough or it will dome up in the middle and shrink down the sides when it’s baking in the oven. (In other words, turn into a disaster. Ask me how I know…) Some traditional methods suggest you use beans or rice. I would avoid these, as they don’t conduct heat well and are not as heavy. Your best options for weight are pie weights (which you can find at most stores) or coins. Yes, that piggy bank full of pennies can be useful!

Cover the shell in foil, folding the edges over the pie plate. Place the weights inside and bake your crust according to the recipe. You’ll want to remove the weights shortly before the pie crust is finished baking so the bottom can brown up a bit too.
Onto the Filling
For this recipe, once again there are some surprise secret ingredients that come to your aid. Pumpkin puree is cooked on the stove with candied yams. The yams (or sweet potatoes) complement the pumpkin well, tasting very similar but adding a depth of flavor. Why first cook the filling on the stove top? The heat will reduce the amount of liquid in the potato puree, concentrating the flavor. Also adding heat to the spices and fresh grated ginger will ‘bloom’ the flavor of these ingredients, building more complex flavors to complement the pumpkin.

When your pie shell and stove top cooking are done (hopefully around the same time), the pumpkin mash is mixed thoroughly with a custard base and strained through a fine mesh strainer. Pour the strained liquid filling directly into the warm pie shell and bake! Ooh la la, you have just baked a pumpkin pie from scratch! Note that you’ll remove the pie when the center is still jiggly. The residual heat will finish cooking the pie through.
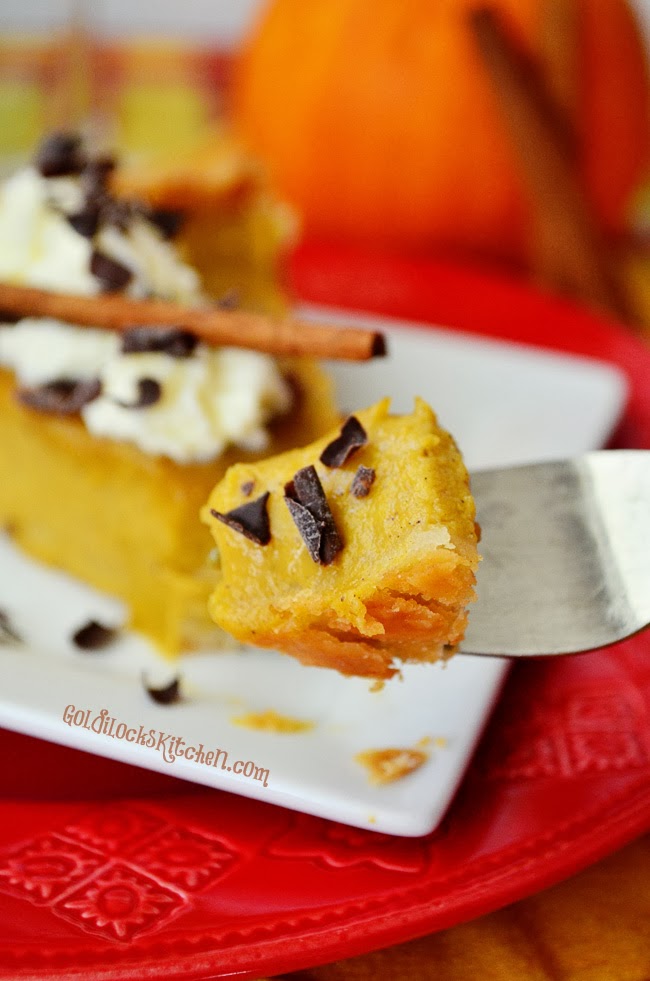
I can’t eat pumpkin pie without a good sized dollop of whipped cream. Chocolate curls don’t hurt for a lovely garnish either. Why not serve a special whipped cream on top of a special pie? Mixing in a bit of brandy or my personal favorite, Torani Caramel flavoring syrup, can be a very tasty top note garnish to a pumpkin or pecan pie. See my simple recipe for Caramel Whipped Cream. (Also coming very soon.)


Pumpkin Pie From Scratch
- Total Time: 1 hour 30 minutes
- Yield: 8 1x
Description
No store bought pumpkin pie can compare to this recipe for Pumpkin Pie From Scratch. Use my foolproof pie dough and you’ll have a lovely time baking it up too.
Ingredients
- 1 prepared single-crust pie dough
- 1 cup heavy cream
- 1 cup whole milk
- 3 large eggs plus 2 egg yolks
- 1 teaspoon vanilla extract
- 1 (15 oz) can of pumpkin puree
- 1 cup drained candied yams from a 15 oz can (can substitute regular yams if candied are not available)
- 3/4 cup of sugar
- 1/4 cup maple syrup
- 2 teaspoons minced or grated fresh ginger
- 1 teaspoon salt
- 1/2 teaspoon ground cinnamon
- 1/4 teaspoon ground nutmeg
Instructions
- Move an oven rack to the lowest position and set oven to 400 degrees. Place a foil-lined rimmed baking sheet on the lowest rack to heat in the oven.
- Roll one disc of dough out on a lightly floured (about 2 tablespoons) work surface to approximately 12 inches in diameter. The dough should be about 1/8 thick. (If the dough becomes soft and sticky return it to the fridge to firm up again.) Roll the dough around a rolling pin and unroll it over a 9 inch pie plate. There should be at least 1 inch overhanging on all sides. Gently lift the edges and lower the dough down against the sides of the pan.
- Trim the overhanging dough to 1/2 inch overhang, then fold it underneath itself so the edge of the dough is flush with the edge of the pie plate. Flute the edges with your fingers, cover the whole thing with plastic wrap and refrigerate until firm, about 30 minutes.
- Remove the pie shell from the fridge and poke a few holes around the bottom of the dough using a fork. Line the chilled dough with heavy duty aluminum foil and fold the edges over the crust. Fill the pie plate with weights or pennies and place the pie on the preheated baking sheet in the oven. Bake for 15 minutes (25 if using my Foolproof Pie Dough recipe). Remove the weights and foil from the pie shell and continue to bake until golden brown and crisp, 5 to 10 minutes more. Remove the pie plate and baking sheet from the oven. Leave the oven on.
- While you’re baking the pie shell, Whisk the cream, milk, eggs, egg yolks, and vanilla together in a mixing bowl. In a large pot, combine the pumpkin puree, yams, sugar, maple syrup, ginger, salt, cinnamon and nutmeg. Simmer the mixture (more like sputter), mixing constantly and mashing the yams, for about 10 to 15 minutes. It should be thick and shiny.
- Remove the pot from heat and whisk in the egg milk mixture well. Strain the mixture through a fine mesh strainer set over a large mixing bowl, pressing on the solids to extract as much liquid as possible. Pour the strained custard into the warm pie shell. Keeping the rimed baking sheet under the pie, place the pie into the oven. Bake for 10 minutes.
- Reduce the heat to 300 degrees, carefully rotate the baking sheet, and bake for an additional 20 to 35 minutes longer. The edges of the pie should be set, and the middle 2 inches jiggly. The internal temp at the center should reach 175 degrees on an instant read thermometer. Cool the pie on a wire rack for 2 to 3 hours at room temperature. Cut and Serve.
- Prep Time: 45 minutes
- Cook Time: 45 minutes
- Category: Dessert
- Cuisine: American